3 Basic Watercolor Washes You Must Know
When you first start your journey with water coloring, you would probably be worried about what materials to buy and the techniques to start with. We tend to overwhelm ourselves with the wide variety of supplies available at the store or binge-watch a zillion watercolor videos on youtube, and finally end up staring at the blank paper and materials not knowing where to start and what to do! (Trust me I have been there. All of us have).
Well, it is very simple - START FROM THE BASICS OF WATER COLORING - Watercolor Washes. If you succeed in mastering the basics, you have a good chance of building a strong foundation on how watercolors work, how they react with each other, how do they play with the water & paper, and much more!
So today, I am going to talk about ‘how to make gradient watercolor washes.’ They are mostly used in large areas of a painting like skies, water, or any kind of background.
I have been using them a lot lately. Gradients add a lot of depth and dimension to your artwork. And you can make as many experiments with it as you want, your creativity is the limit. They form the base of almost all water coloring. So it's pretty important to know the basic techniques and then you can unleash your magic of water coloring!
What I personally love about them is every time I paint them, it's a surprise! No two gradients look the same even if the colors & techniques are the same. This is probably because watercolors are not a medium to be too controlled, it is very flowy and does their magic on their own. The whole charm of watercolors lies in their transparency, glow, and imperfect effects on the paper which probably no other medium can give. I believe watercolors can very closely reflect the emotions of the artists at the time of painting and it is super relaxing and fun!
So before we start, here are the materials you need and a few simple tips to keep in mind throughout.
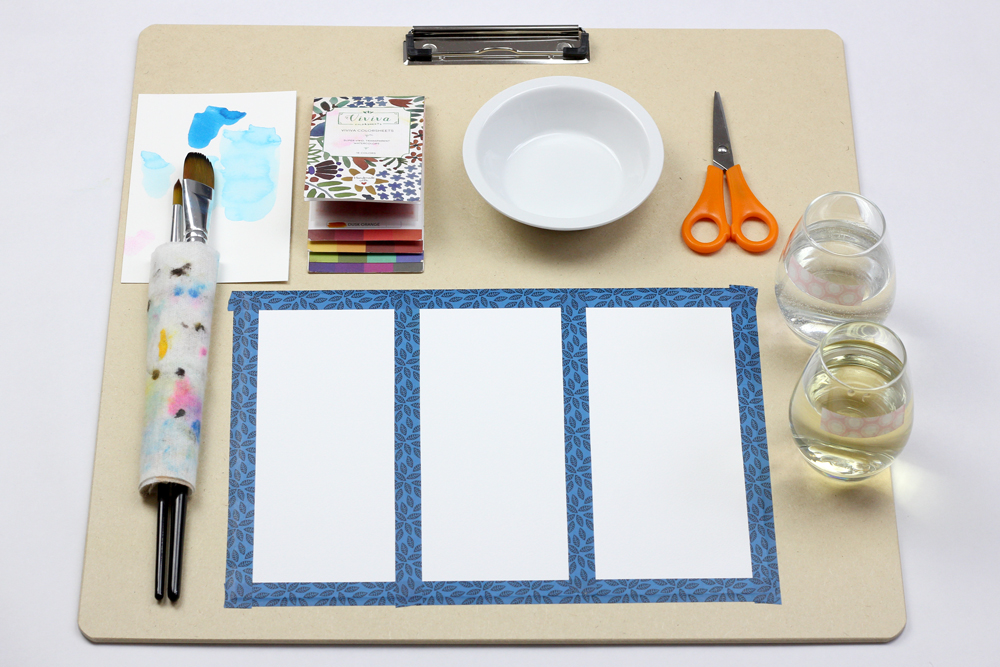
Materials:
-
Watercolor Paper (anything above 92lbs or 250gsm): I am using a local brand cold pressed textured paper 300 gsm.
-
Large size brush in any of the Round, Flat, or Mop: I am using a large flat brush size 20
-
A good quality watercolor set. Always remember quality over quantity. You can even buy less number of color shades but a decent quality is a must. I am using premium watercolor sheets by vivivacolors.com
-
2 jars of water: One for cleaning your brush and another for adding clean water to your painting.
-
Board: Having an artboard or any smooth surface board is important, mainly to be able to lift your painting whenever you want and to fix your painting in one place, and avoid constant shifting of the paper. If you don't have one, you can always go for an alternative like an old chopping board, a thick book cover or worst case skip it.
-
Masking Tape (optional): You can use masking tape to protect the edges of your paper and to divide it into 3 parts. It helps to fix the paper on your board too. (I use washi tape)
-
Piece of Cloth: A small piece of cloth to wipe clean your brush in between colors. Well, I use a piece of cloth as it is reusable and more environmentally friendly. But, you can use a paper towel too.
Tips:
-
Decide on the color palette and prepare the poodle of colors in advance. Make a little more than you think you would need. Don't worry about them drying off as you can always reactivate watercolors with water, they won't go to waste. That's the beauty of this medium and one of the things I love about them!
-
(Optional but highly recommended) Fix your paper on the board as shown in the image above.
-
While adding color to the paper, charge up your brush with a good amount of color.
-
Once you start painting on the paper, try to work quickly throughout the process as your colors might start drying and wouldn't mix into a smooth transition.
We are all set to start painting! Are you excited? Let's go...
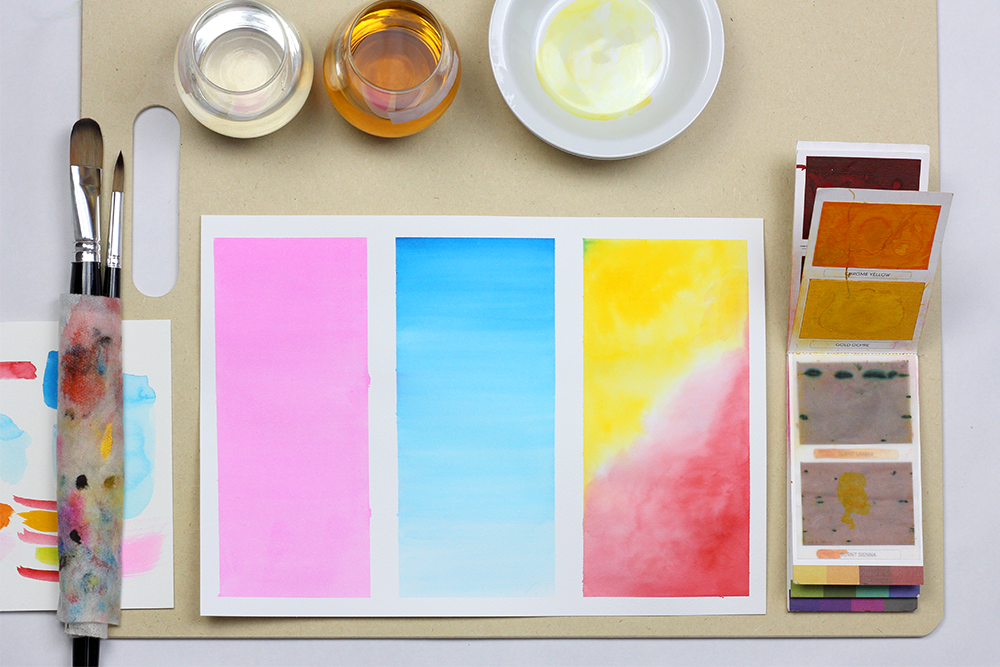
Flat Wash:
This technique is all about creating an evenly toned wash throughout your paper. It can be a bit tricky in case you are too slow or if the brush doesn't have the right amount of color or water. But not to worry I have you covered in the following steps.
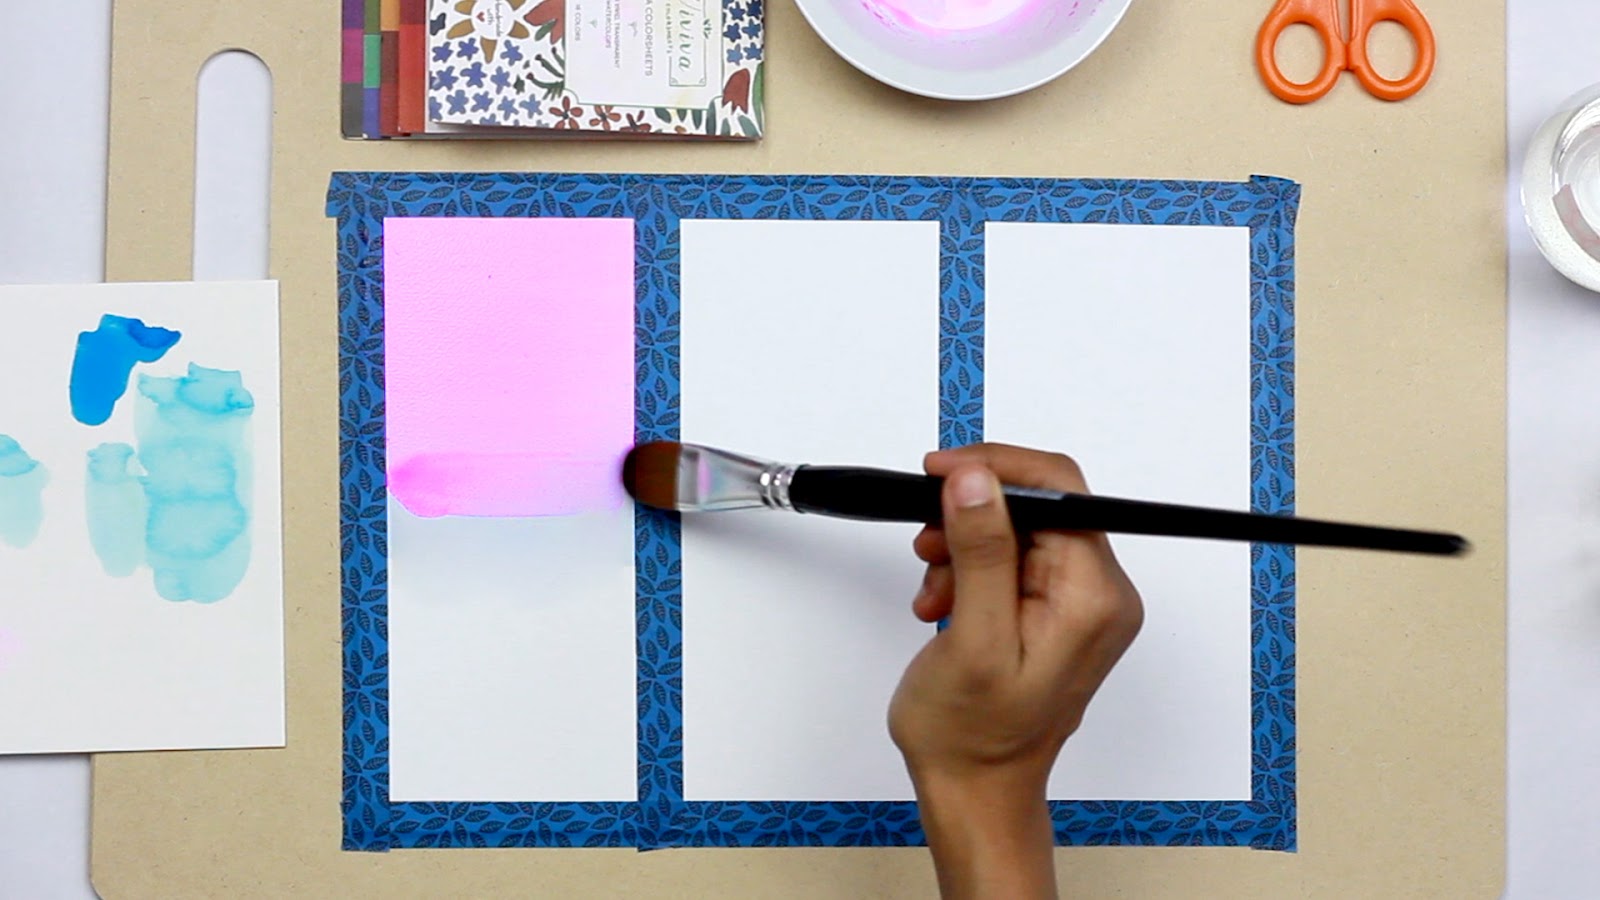
Step1: Make a good amount of the color you selected and load your brush generously. Make sure it is not dripping. Lay down the brush maintaining a slight angle of 30-40 degrees on the paper and start making big horizontal strokes either from left to right or right to left, whatever you are comfortable with. Maintain the direction that you choose throughout the entire wash to have a smooth transition of color.
Step2: After the first stroke of paint, move your brush slightly down and make another sweeping horizontal stroke and so on and so forth until your color starts fading. Once the color starts to fade, it is time to reload your brush with paint. Now again start making strokes from where you left off the last time. Continue this till you reach the bottom of the paper.
Step3: Notice that the paint might pool near the edges of the masking tape. If you don't want to end up having a darker border on your paper, then simply pull down the paint with your brush or dry your brush and lay it on the extra pool of paint. It will absorb the extra paint.
Step4: If there are any uneven patches or blotches feel free to brush them again from the top to the bottom but avoid too many repetitive strokes at the same place as they might rupture the paper texture. I personally embrace such sweet accidents and let them be as it is. They look beautiful anyway!
Gradient/Graded watercolor washes (Wet-on-Wet):
In this technique, we will create a graded wash of the same color from top to bottom. I have chosen the color blue to make an underwater sketch but you can use any color of your choice. This is a wet-on-wet technique which means we wet the paper surface with clean water first and then add color to it. It promises a much softer color transition throughout. These can be used for painting skies, water or can be great backgrounds for sketching and greeting cards.

Step1: In your palette make two shades of the same hue. One which is concentrated and dark and another which has at least 40-50% water, this would form the lighter side of the hue.
Step2: In this step, we will wet the entire section of the paper with clean water, to do so - load your brush with clean water, make sure it is not dripping and start giving big horizontal strokes from top to bottom until you cover the whole section. Avoid creating puddles on your paper if you want a soft transition. Once you’re done, your paper should have an even shine throughout. You can always tilt your paper in the light to check if you have missed out on any spot and cover it.
Step3: Now that your paper is nice and shiny with a layer of water, load your brush with the dark shade of hue first and start making horizontal strokes from one direction. Try to maintain the direction you choose for a smooth transition. After 3 strokes, start adding tiny amounts of water in your color and continue making strokes. If there is any extra paint, pull it down with your brush and make another stroke, and so on and so forth until you have covered 1/2 of the page. You will notice that there is a natural transition of color from dark to medium.
Step4: Clean your brush, dry it, and dip it in the puddle of a lighter shade. Take a good amount of color and continue stroking from where you left off and keep moving to the bottom. You will notice that the colors are merging. Feel free to brush them again to create a softer transition. Keep adding more and more water as you move to the bottom to create a wide range of hues throughout the paper.
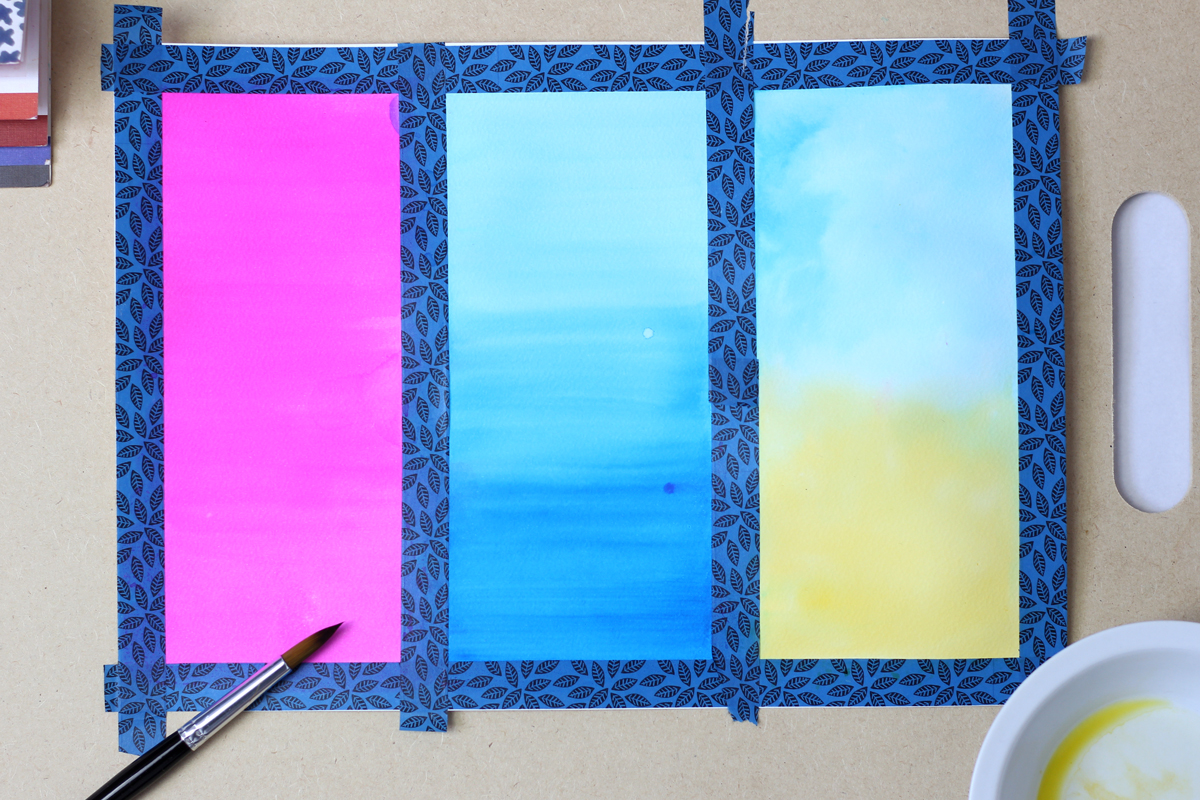
If you are happy with the results congratulations! Now you have a beautiful background for your desired art. In my case, I needed more depth at the top of my paper and hence I went ahead and added a few more strokes of darker shade at the top and very soft strokes till the bottom to give that even look.
Variegated watercolor washes (Wet on Wet):
This technique is my personal favorite. I love to mix different colors and it is always a surprise how well they blend together. This time I have chosen yellow and red. You can always look up the ‘color wheel’ on the internet and pick complementary or contrasting colors that you love.
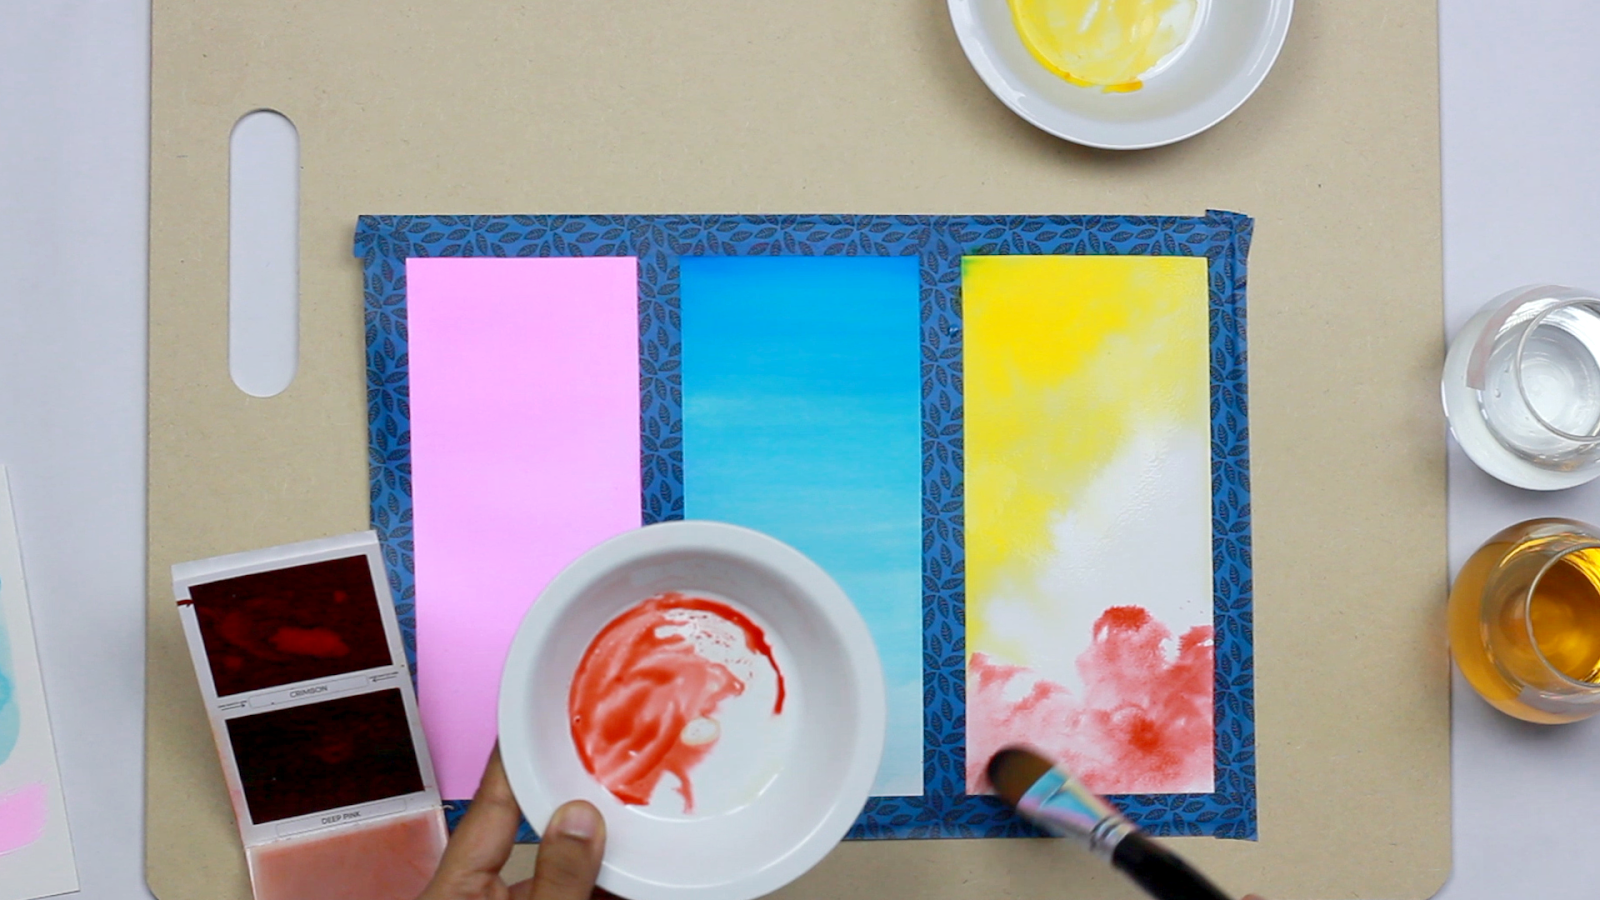
Step1: Make 2 separate color puddles of your choice.
Step2: As this is wet on a wet technique we will first evenly wet the paper with clean water. (Refer to step 2 from the previous technique)
Step3: Now that your paper is nice and shiny with a layer of water, load your brush with one of the colors and start dabbing it from one side of the paper. I prefer going from one corner diagonally towards the center. You will notice that the color is spreading easily due to the wetness of the paper. Feel free to add small amounts of water if you want more fluidity to your color.
Step4: Once you are happy with the results move on to the 2nd color of your choice. Before adding color to your paper, check if that portion of the paper is still wet. If not then first add some clean water to that area and then start adding blobs of color. In my case, I will go from the opposite corner diagonally to the center. Keep playing and experimenting till you are happy with the results and then let it dry. You can also follow this technique with more colors.