DIY Ideas - Create your own custom made earrings at home!
Hello Beautiful people! It's summertime and I thought why not try making some DIY ideas and share them with you all. In this DIY idea, you will learn to make your own custom-made earrings made out of air-dry clay, some painting materials, and epoxy materials that you will easily find in any nearby art store. It's easy, fun, and a great way to make your holidays creative and full of colors.
Are you ready to make some Dazzling pair of earrings? Here you go:
1) For making the earring’s base you need:

- Jar of Water
- Rolling Pin
- Rolling Board
- Cookie Cutter Shapes: I have used circular and star-shaped ones. You can take any other shape of your choice
- Parchment Paper/Butter Paper
- Newspaper
- Air Dry Clay/Modelling Clay
- A Toothpick
2) Materials for painting the Earrings:
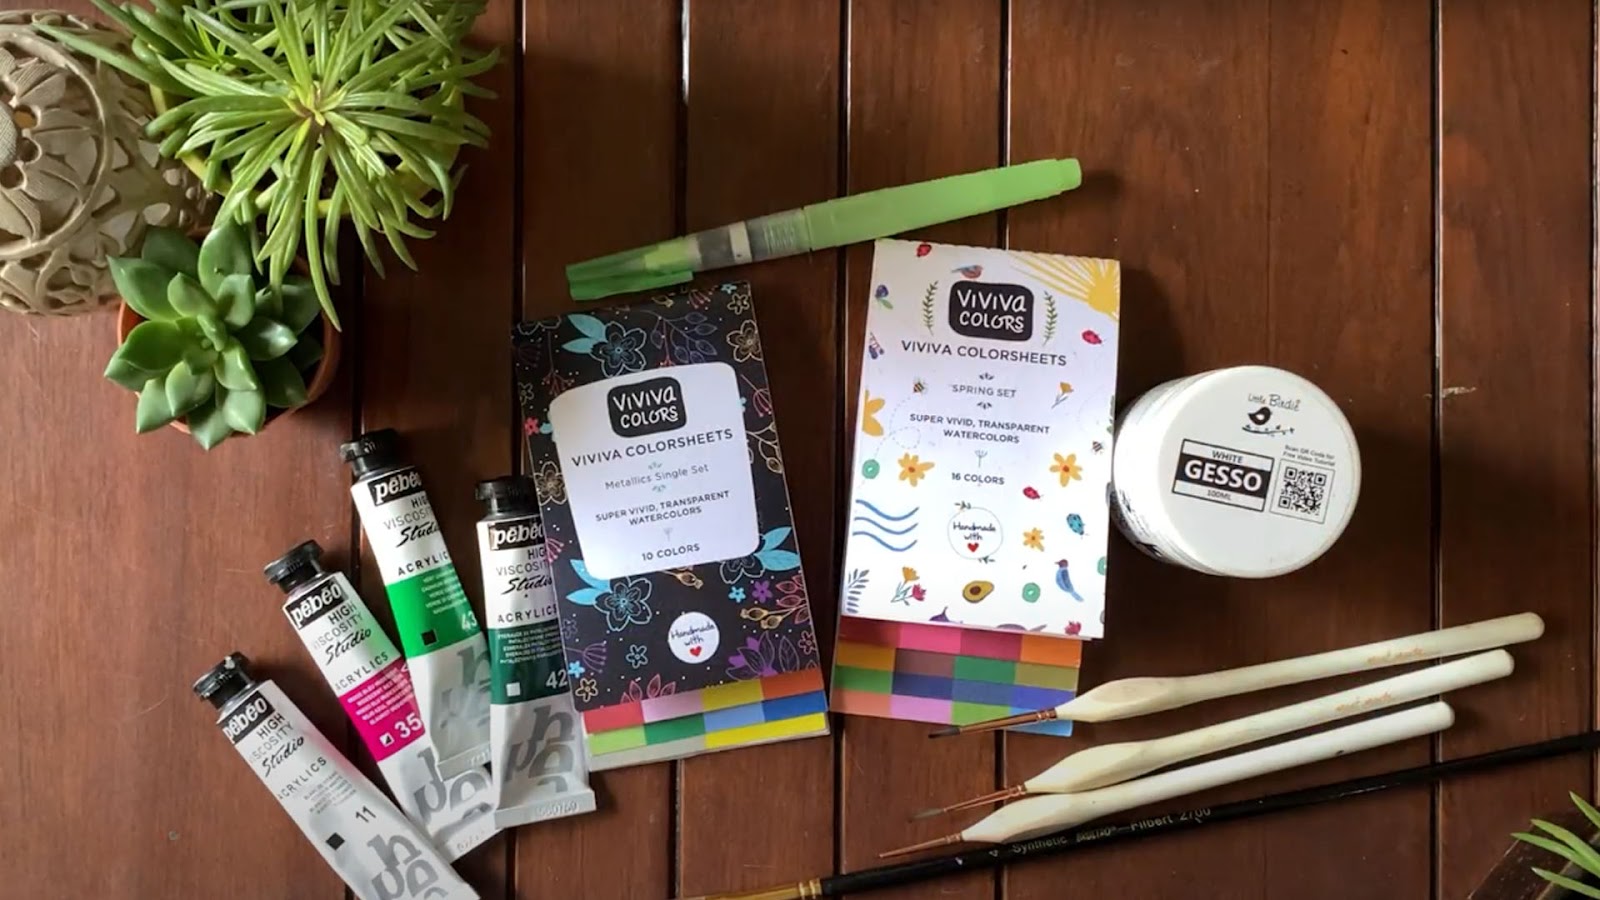
- Viviva Colorsheets - Spring, Metallics, and Original set. You can use any other watercolors you like.
- Acrylic Paints - Choose any 4-5 colors from your set
- Color Palette
- Brushes: I am using a water brush and few detailer brushes
- Gesso: Can be found any nearby art store
3) Materials for Resin Coating at the end:
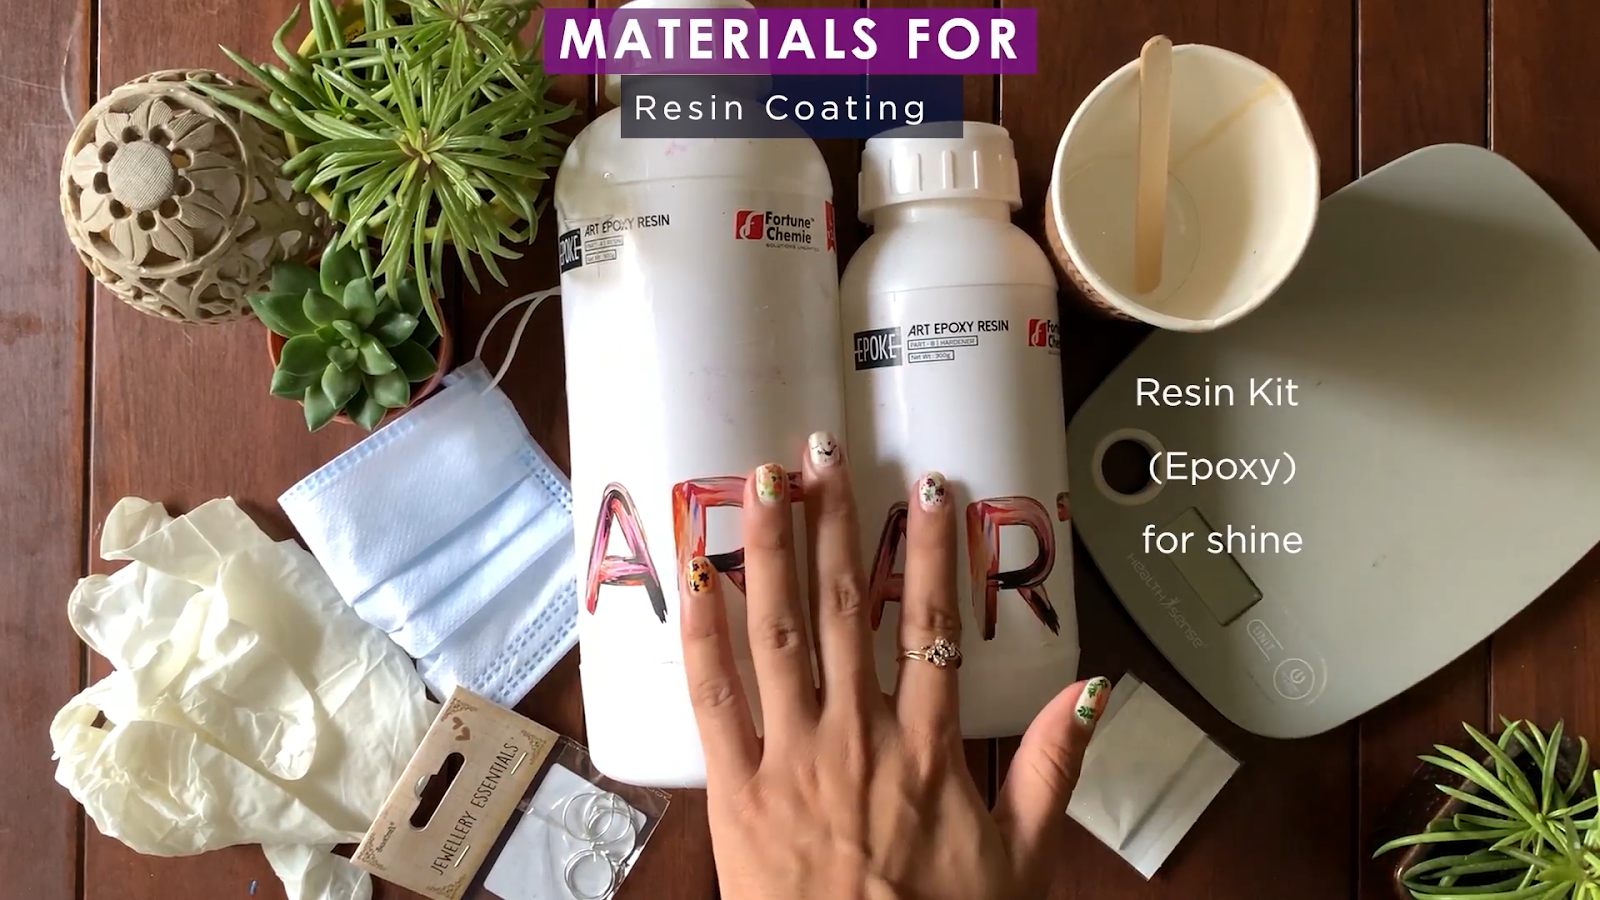
- Pair of Gloves
- A Mask
- Resin Kit (Epoxy) for shine
- Paper Cup & a Candy Stick
- Kitchen Weighing Scale
- (Optional)Holographic Sparkle (for some glitter effect)
- Earring Hoops
You can always substitute the supplies with ones you already have at home and the colors of your choice.
All set? Let’s go!
Check out the video to see this in action:
Let’s make the Earring Base:

Take a newspaper or any kind of a rag and spread it across your workspace. This will protect the surface you are using. Setup the materials to make the base of the earrings. Start by taking a small chunk of Air dry clay and knead it as fast as possible before it dries. Add small amounts of water when needed. Keep kneading until it's soft. Now slowly start rolling out the clay until you have achieved a medium thickness. Apply water if the clay feels dry. When it has reached the right thickness, use the cookie cutters and cut out the desired shapes of your earrings.
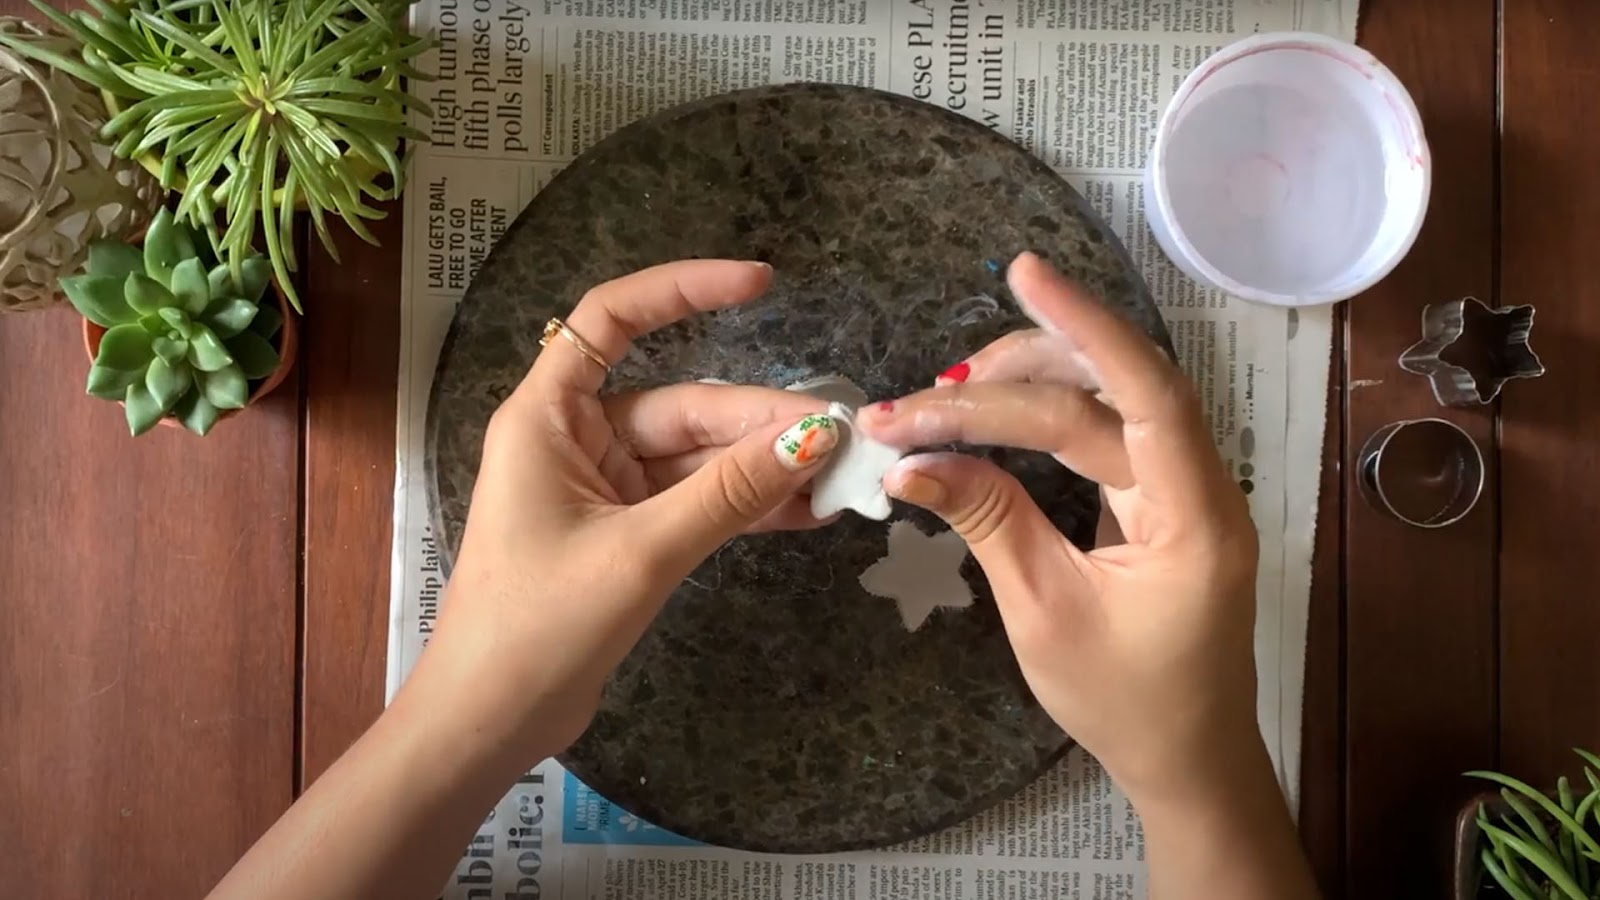
Remove the excess clay around the earring shapes and smoothen the edges of the earrings.
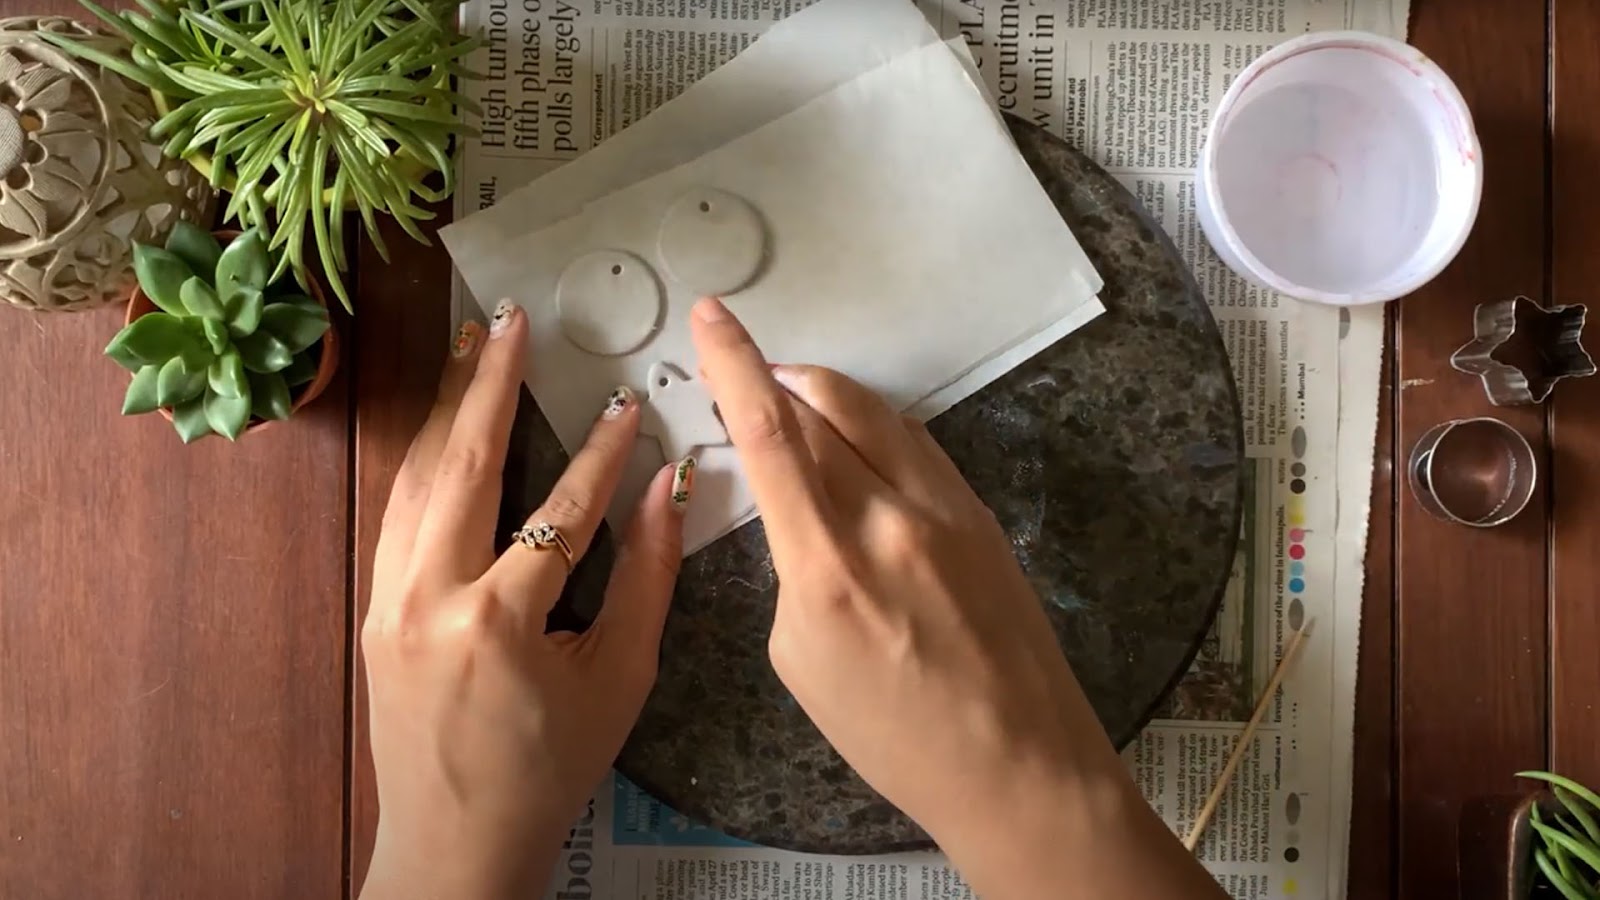
Take a thin bamboo stick or a toothpick and make holes for the earring hoops to be inserted later. Clean the backside of the earrings to smoothen it out and for a complete finishing add very little water on the surface and make the clay even throughout. Now take a small piece of parchment/baking paper and transfer the clay bases on the paper for easy removal after drying up. Let them dry for 12-24h depending on the type/brand of the clay you are using.
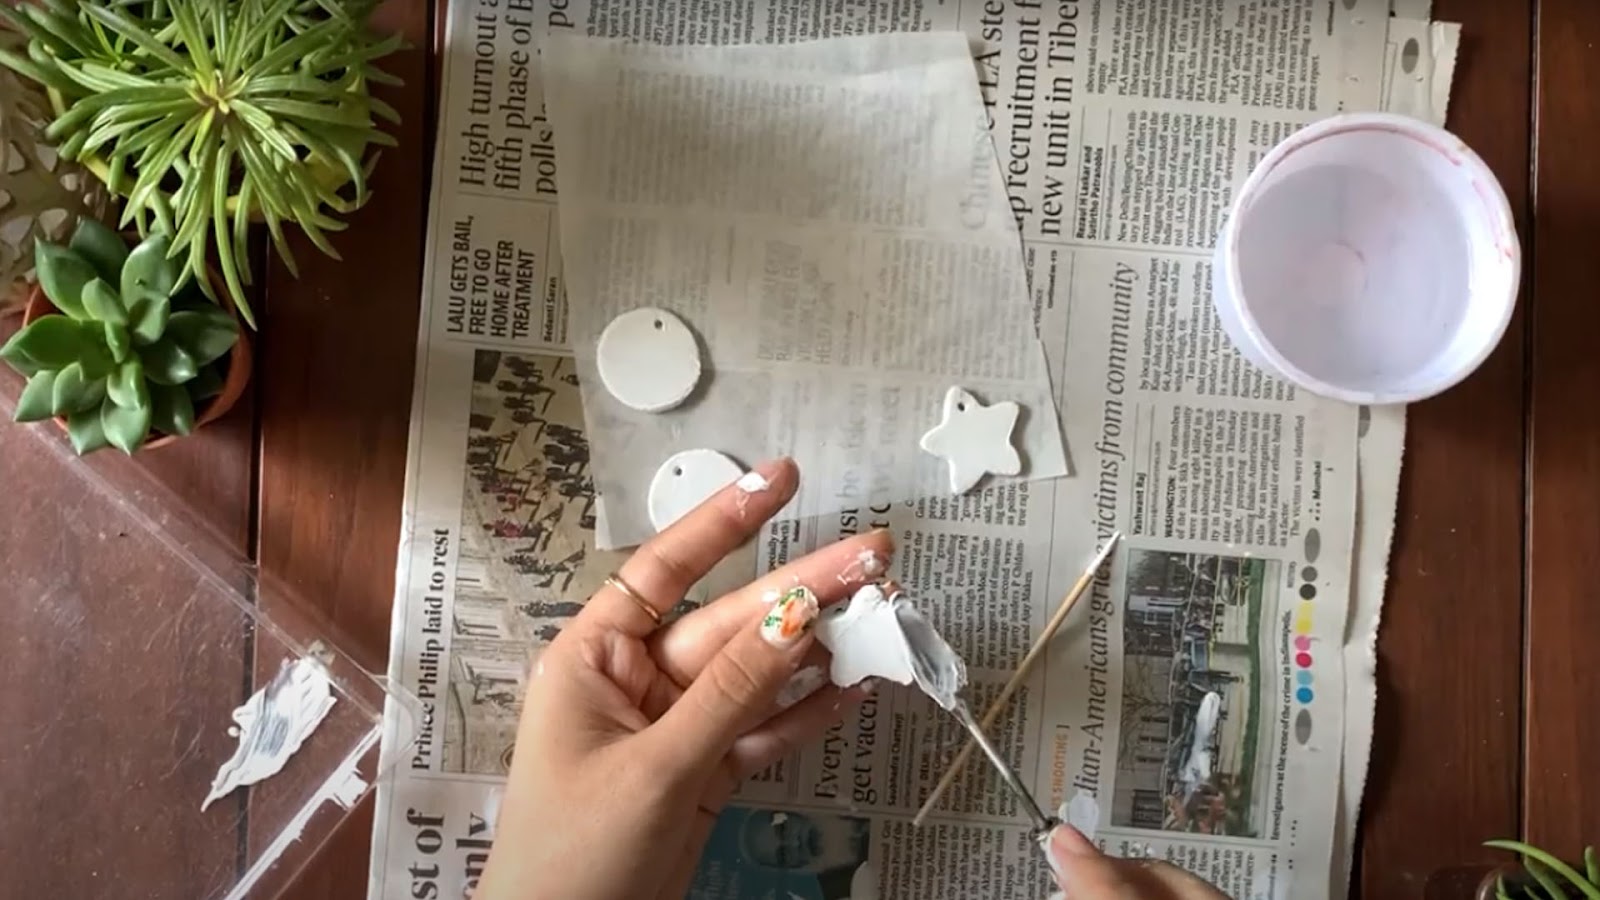
After 24hrs, they are now completely dry and ready to be painted. Before you color them, make sure to apply a thin, even layer of gesso on them to keep them from soaking the paint. After 20-30min the gesso will be completely dry and now we are ready to paint!
It’s time to Paint!

I am using Viviva’s Spring Set watercolor- Midnight Blue + Indigo for the below half of the circle and Burgundy for the above half of the circle. Use a detailer brush and make smooth strokes and cover the entire area. I have blended the burgundy and midnight blue color for a smooth transition. One of the advantages of using watercolors in these is that they blend so well due to their fluidity. They also give a very shiny finish. You can also use acrylics in this step if you like.
Moving on, let’s paint the star-shaped earrings too. I have used Slate black for the borders and Ocean Blue for the center. Merge both of them to have a beautiful blend.

Now add Fire and Lava from Metallic Colorsheets by gently dabbing to add that extra shimmer to them. I have also used Aurora and Metallic silver and in the end some Metallic gold to add a galaxy effect. Our background is now ready!
Until the star-shaped earrings are drying let us paint the foreground for our circular earrings. I have made tiny pink flowers with some detailing on them with acrylics. You can make anything of your choice.
Make small white star-like spots on the star-shaped earrings with glue (for a 3D effect) and let them both dry.
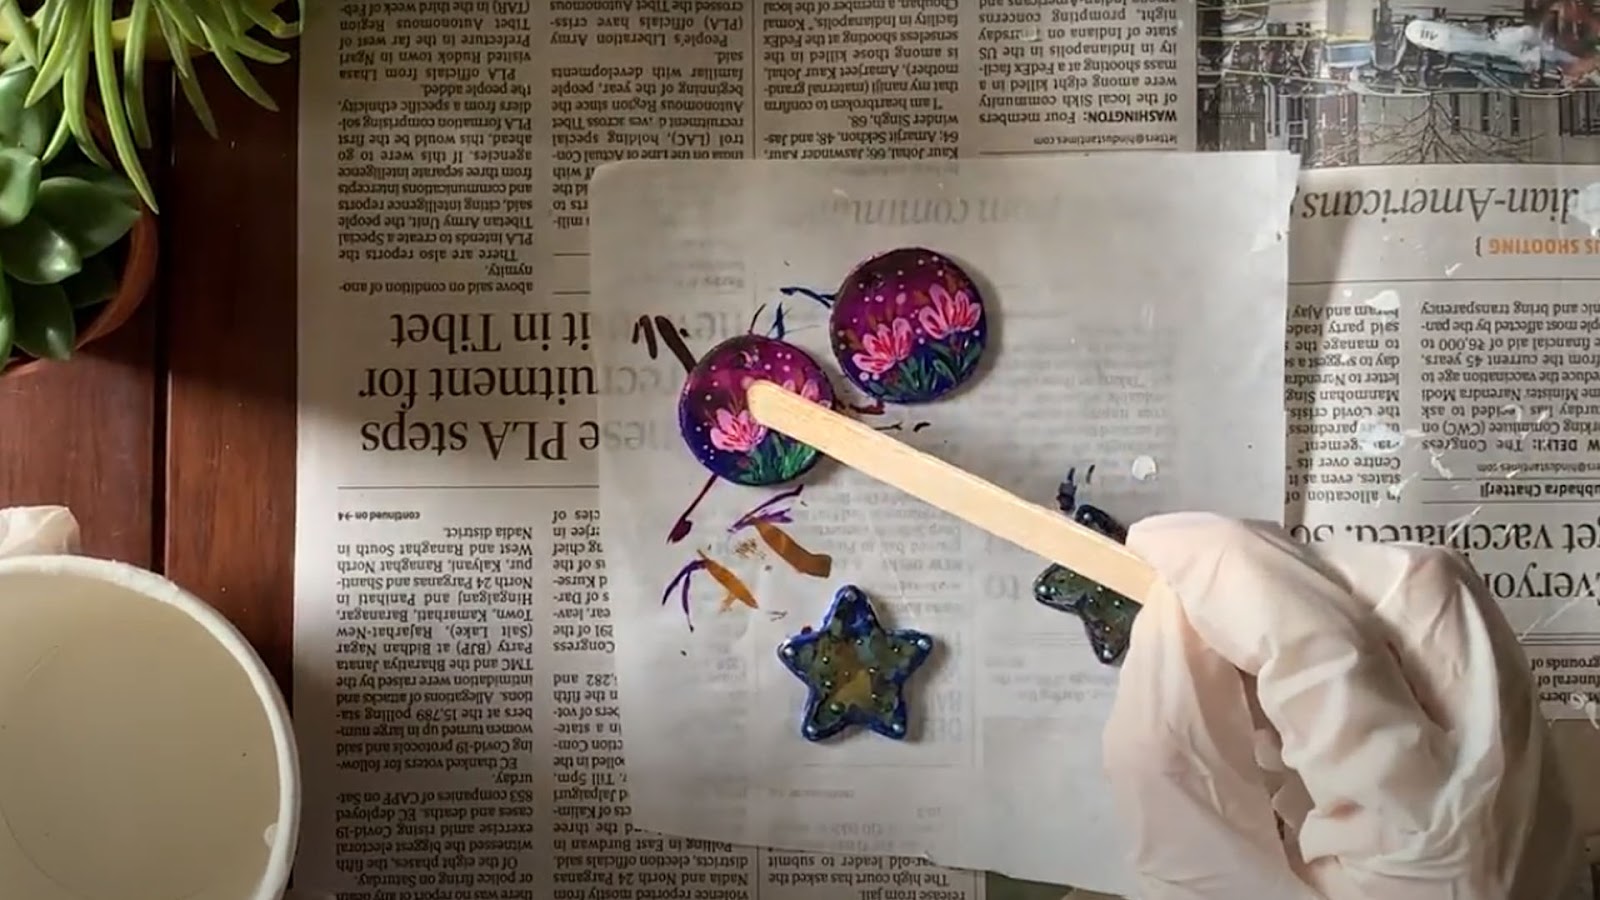
Now it's time to coat the earrings with Epoxy Resin. I am going to mix 4gm of resin with 3gm of hardener. Mix well for 5min until it reaches an even consistency. Now take a candy stick and apply it on both earrings evenly. Once done cover it up with a vessel/container and let it dry for 24hrs.
Now attach the hoops to these earrings and Voila! You have 2 new earrings in your jewelry set. Wear them for a Sunday brunch or simply dazzle with them in a party. I hope you enjoyed this easy DIY idea tutorial.
Don't forget to share your results. See you in the next one!


