Paint ‘Cherry Blossom Landscape’ with me
Do you need a short break from your busy schedule and make something fun? Sometimes taking some time off and making a simple painting can help you concentrate on your work better. Motivate and inspire your day with this cherry blossom painting in just 10min. Grab your paints and paint along with me.
You can always substitute the supplies with ones you already have at home and the colors of your choice. Now without further ado let's go!
Catch all in action here:
Before you even start painting, you need to set up a couple of things -
-
To set up your paper, tape it down on each side of the board.
-
Keep your palette ready with ‘Cherry blossom’ pink and ‘Indigo Blue’. You can substitute these with any pinks and blues you have.
-
I generally keep 2 jars of water - one for cleaning my brush and another for adding it to my painting.
Step 1: Mask the borders with a Masking Tape/Washi Tape Step 2: Wet the whole paper with a layer of water + ‘Cherry Blossom’ color
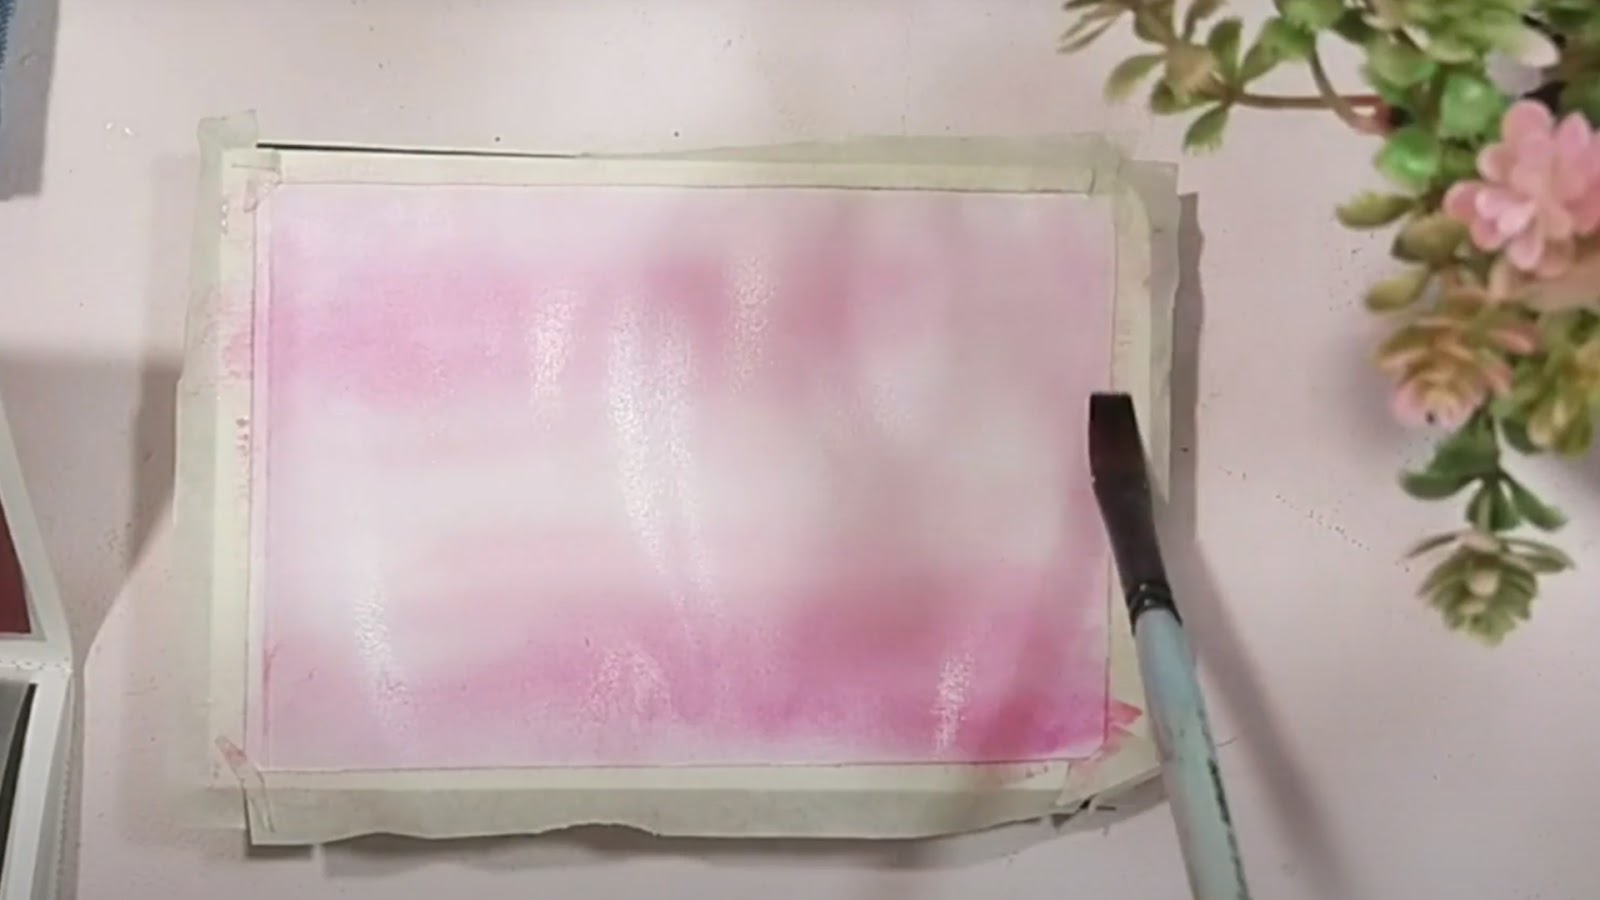
You can use a flat brush size 10/12 for the water wash. Take a good amount of water and load your brush generously. Make sure it is not dripping. Start by making big horizontal strokes either from left to right or right to left, whatever you are comfortable with. Maintain the direction that you choose throughout the entire wash to have a smooth transition of color. Your paper should be evenly wet without creating puddles of water on the paper.
While the page is still wet, load your brush slightly with the cherry blossom color and continue making the horizontal strokes, giving it a slight tinge of pink. Keep doing this until you are satisfied with the background. I personally enjoy this step the most. Looking at the pigment spreading onto the wet paper is a therapy in itself. Moving on...
Step 3: Adding ‘Mountains’ with Indigo & Midnight Blue!

Wait for the paper to dry. You can also use a blow dryer/hot gun to fasten the drying process. Now time to add the blue-purple silhouettes of the mountains to the landscape. Take a number 6/8 round brush, load it slightly with the Indigo/Midnight Blue color, and start making loose-handed silhouettes of the mountains across the paper. Keep the water consistency a bit more as we are creating the foundation first.
You can make the silhouette and pull the color slightly down, making it look blended and smudged. Notice there are no harsh lines out here. To have an effect of near and far mountains, make the farther ones with midnight blue and the near ones with Indigo giving it a good depth.
Once the first layer has dried off, add another layer of Indigo blue. This time you can make the mountains look a bit 3D by the shading technique shown in the above image.
Step 4: Time to add some Greenery!
I have used Olive green here. I love the freshness it adds to any kind of landscape. Take a brush size 10/12 and loosely dab olive color at the base of the mountains. Make uneven shapes and cover a portion of the paper giving it a beautiful tinge.

Now add another layer of olive green, this time with lesser water as it makes the color look more vibrant. Make small vertical strokes that look like long green grass. There is no one method to do this hence, go with your instinct and enjoy!

Now I am going to add a contrasting color “Treebark Brown.” This will add great dynamism to my painting. Follow the same steps as we did for the olive green. Dab gently throughout this space and then with a darker shade makes vertical brush strokes.
Step 5: painting some “Cherry Blossoms”
Make a couple of branches from both sides of the paper using a ‘treebark brown’ color as if they are peeping in the landscape. Now use the metallic cherry blossom (my favorite) and dab it gently with your brush size 6, making small pink petal-like dots on the branches. Repeat this process until you are satisfied with it.
I often put another layer of dark pink shade on it for it to look more vibrant.

Step 6: The best part of the painting - tape peeling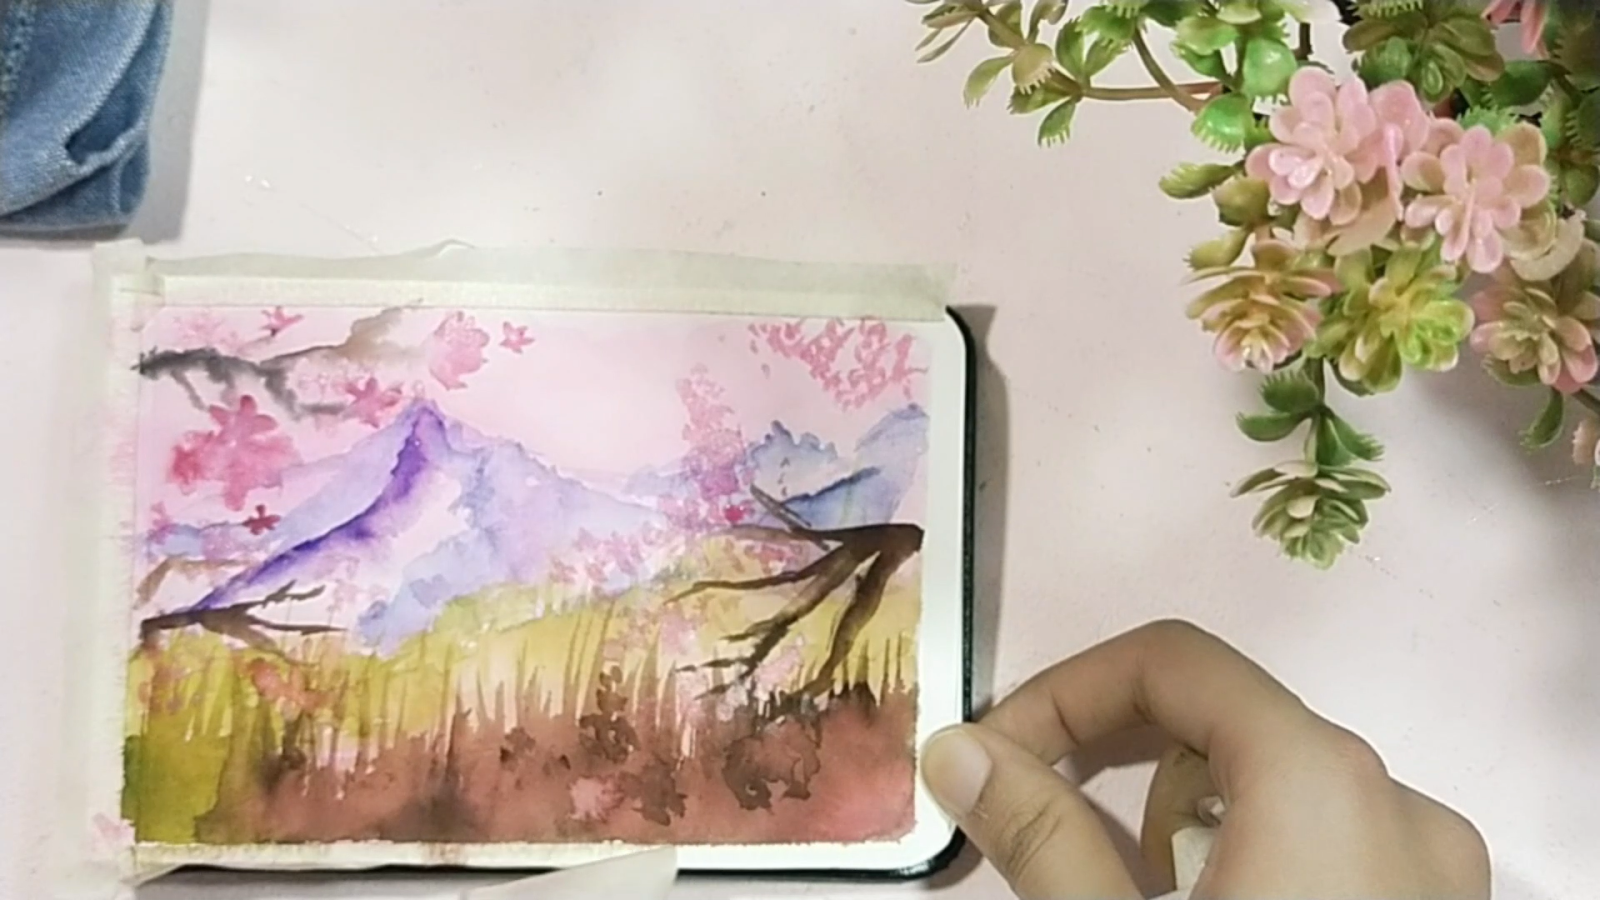
Here comes the best of making any painting, Tape Peeling!! It's so satisfying. Make sure you pull out the tape gently as sometimes your paper might tear. And your painting is done!
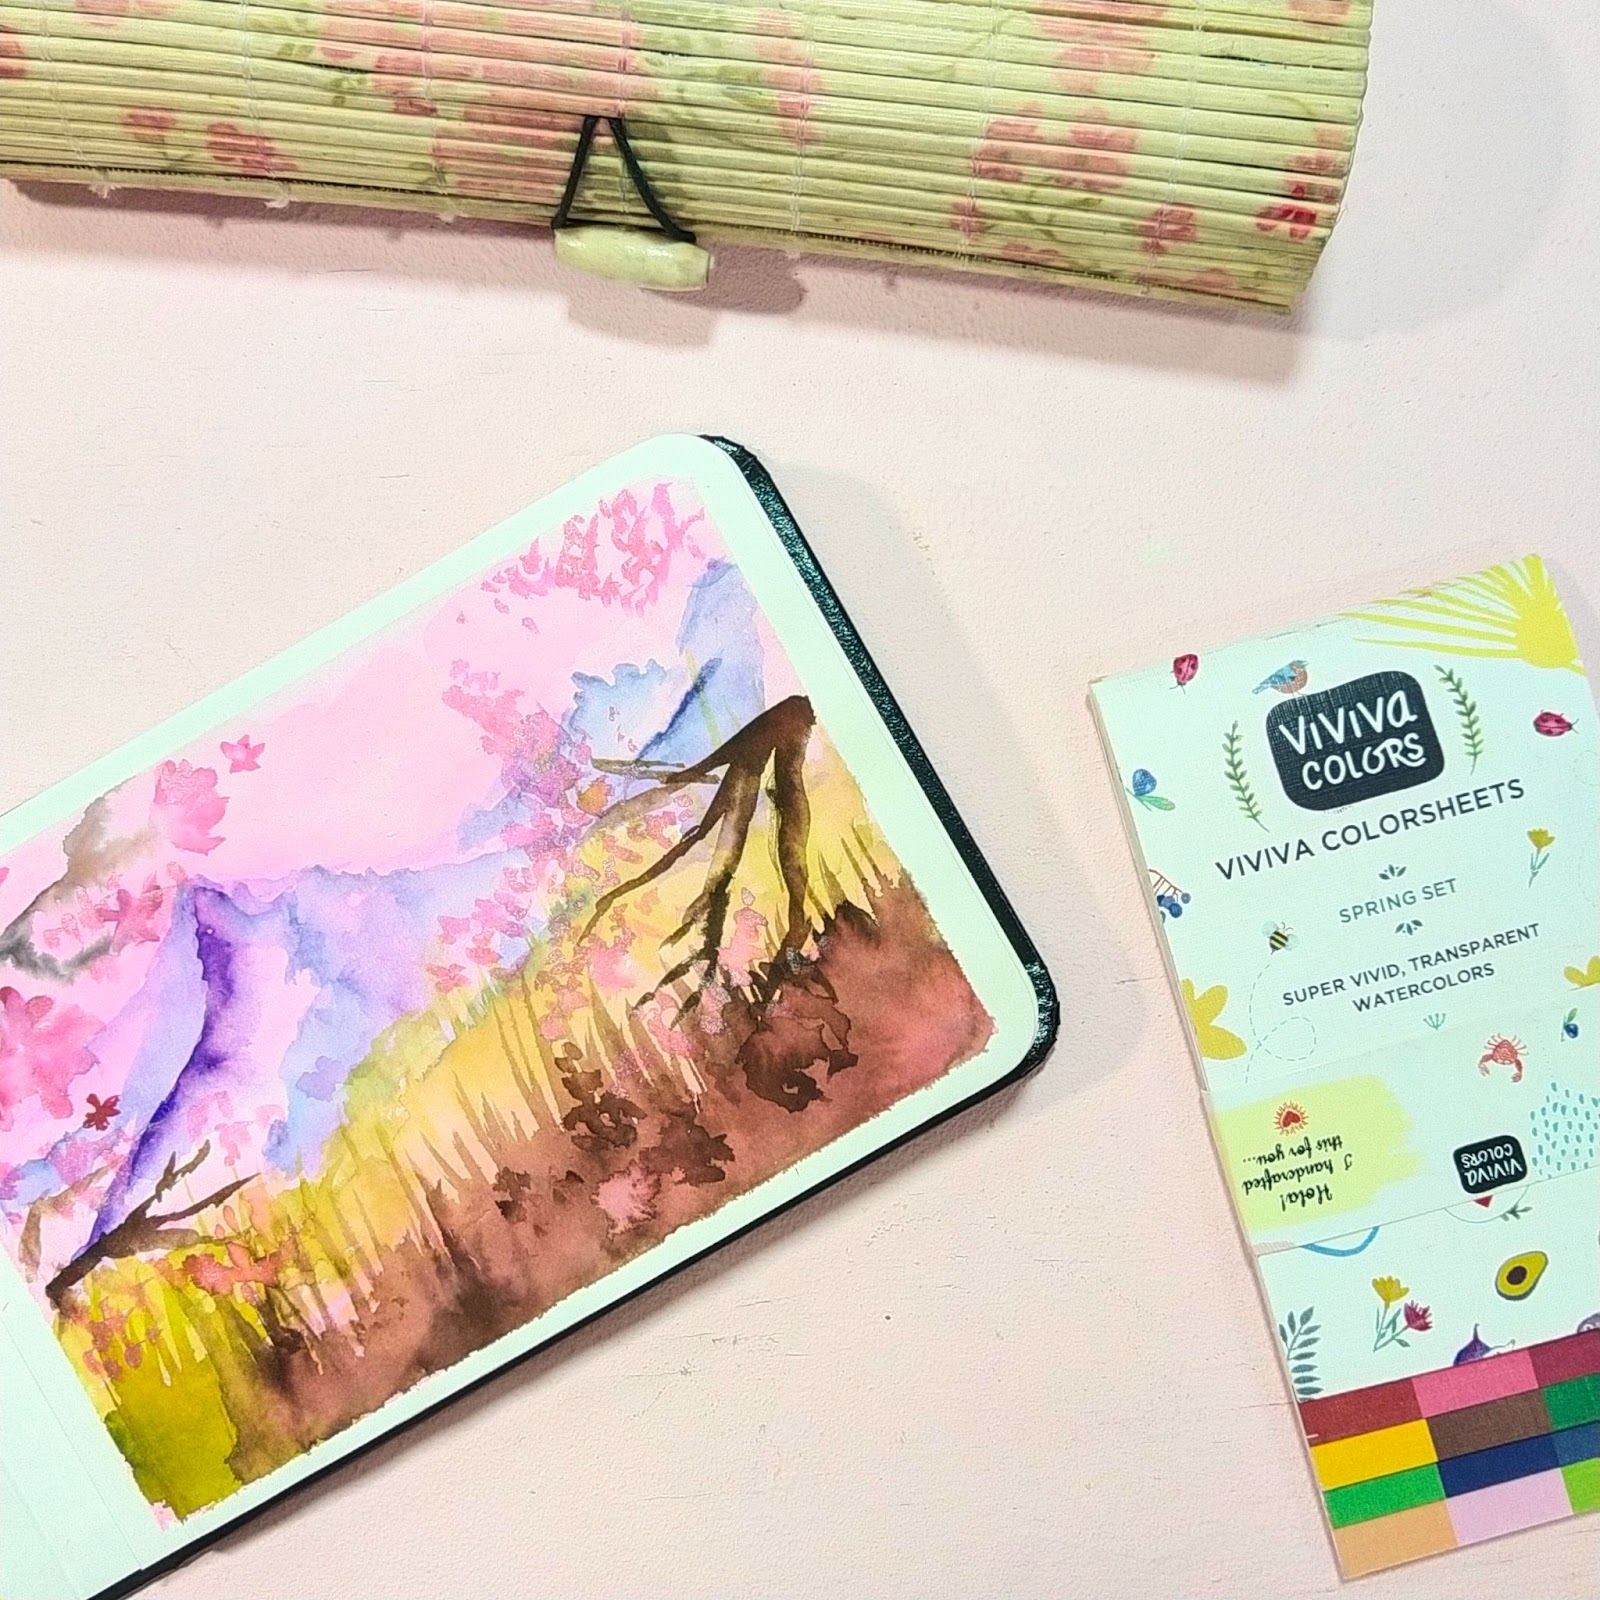
I hope you enjoyed this simple Cherry Blossom Landscape Tutorial.
Also Read:
Four Potted Cactus in just 10min!
Spring Painting - 4 types of fruits with watercolors


